I keep my indoor decor pretty minimal. Last year, we added the googly eye framed skeleton. This year I have two more items to show you. Both were pretty quick and made with supplies I had on hand making them free projects!! If these inspire you to create your own decor and you do not have supplies on hand, they can be made for under $15 for both. While these are not tutorials per se, I hope they will give you some ideas to make your home hauntingly happy.
The Nevermore art.

I found a plaque many months ago for seventy-five cents at my local Goodwill similar to this one from Casey's Wood. I painted over the faded floral image with orange acrylic craft paint and let it dry overnight. Then, I found a photo online of a raven silhouette and freehand painted this on as best as I could. I added the "Nevermore" based on a font I found it Word, but it just looked too clean, so I mussed it and the sides up a bit. Done and done!
The Spiderweb frame.

While waiting for the orange paint to dry in the Nevermore art, I spotted an open wooden frame I bought a long long loooong time ago for some project. I slapped a coat of black acrylic paint on that and glittered it up. Next, I found a free pattern for a spiderweb on the Crochet N More website and modified it to fit my frame. Ravelry notes here. Then, I soaked the finished web and stretched it to the edges of the frame, stapling it to the back of the frame while the web was still wet. For a finishing touch, I placed a rubber spider that I glittered last year on the web and called it a success.
What fun projects have you done for Halloween this season? If you link to your photos or blog, I promise to pop by for a peek.
Have a great weekend!


 Step Three. Iron flat.
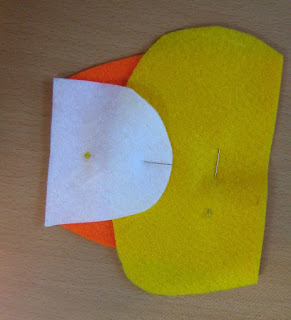
 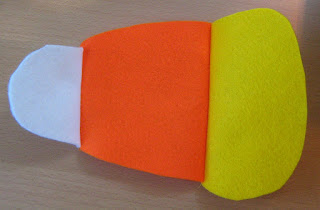 Step Four. Take the candy corn front piece and trace the shape onto an orange piece of felt for the backing. As seen in this step, to make the pieces overlap for candy to be put inside, I traced the white/orange at the top of the felt and then traced the orange/yellow at the bottom of the felt. When I cut them out, they will overlap. (Two front pieces shown in example)
 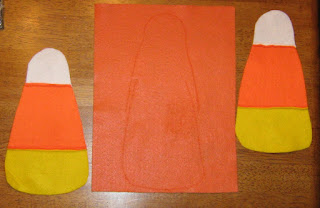 Step Five. Cut pieces and pin together. See how they overlap similar to the back of a pillowcase? That is how you'll get the candy inside when completed.
 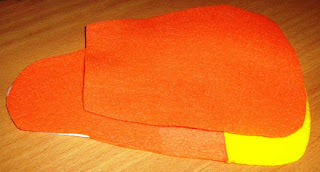 Step Six. Sew all the way around either on the inside or the outside as you prefer. See final photo at top of tutorial for examples of both ways.