
Supplies Needed:
A Funkin, or any other carveable fake pumpkin from your local hobby shoppe
X-acto knife
Template for carving (easy Google image search)
Black acrylic paint and small paintbrush
A push pin

Directions:
1- Tape your template of choice to the Funkin and dot the outline using the push pin.
2- Using your X-acto knife, carve around the outline. As this was my first experience with fake pumpkins, I will tell you, they are inconsistently thick and thin, so watch where your fingers are so that you do not cut yourself. Remove all carved pieces.
3- Make a 1 inch diameter hole in the bottom of the pumpkin. If you plan to light your pumpkin with a battery operated light, this hole will need to be bigger. I am not lighting them, but placing on our fake fences, so I only made the hole wide enough for the paint in Step 4 and to fit on my fence as you see in the top photo.
4- The messy step! I recommend doing this over your sink with paper towels nearby. Using the acrylic paint, squeeze generous amount into bottom of pumpkin, first coating the uncut back by rolling the pumpkin around slowly. I tried watering down the paint but it just rolled around in the pumpkin and made a big mess. Keeping the paint thick helped it to coat the Funkin nicely. Use the brush to accent the creamy part of the cut pumpkin as you see in the below photo. Try not to get too much black paint on the outside, but it will wipe away with a damp sponge if needed.
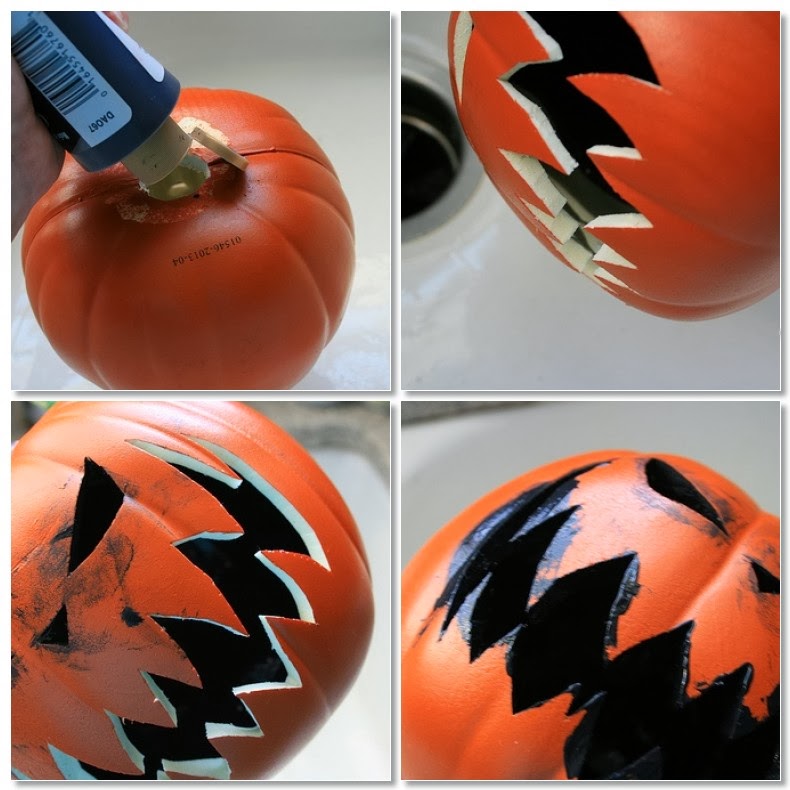
5- The bonus of making a mess on the outside of the pumpkin is that you can accent it as you see fit.
6- Once the inside is thoroughly coated, set upright on a container (like a clean yogurt cup) to drain and dry for a day or so.
When you're done, you will have a Jack Skellington (or other image you chose) pumpkin to last through years of trick or treating.
Happy Halloween!