Since my front yard is taken over every year as an over-the-top fun filled fake cemetery,
I keep my indoor decor pretty minimal. Last year, we added the googly eye framed skeleton. This year I have two more items to show you. Both were pretty quick and made with supplies I had on hand making them free projects!! If these inspire you to create your own decor and you do not have supplies on hand, they can be made for under $15 for both. While these are not tutorials per se, I hope they will give you some ideas to make your home hauntingly happy.
The Nevermore art.
I found a plaque many months ago for seventy-five cents at my local Goodwill similar to this one from Casey's Wood. I painted over the faded floral image with orange acrylic craft paint and let it dry overnight. Then, I found a photo online of a raven silhouette and freehand painted this on as best as I could. I added the "Nevermore" based on a font I found it Word, but it just looked too clean, so I mussed it and the sides up a bit. Done and done!
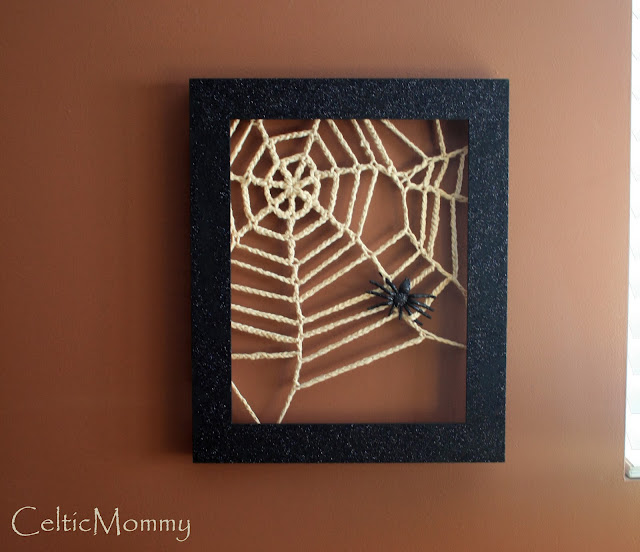
The Spiderweb frame.
While waiting for the orange paint to dry in the Nevermore art, I spotted an open wooden frame I bought a long long loooong time ago for some project. I slapped a coat of black acrylic paint on that and glittered it up. Next, I found a free pattern for a spiderweb on the Crochet N More website and modified it to fit my frame. Ravelry notes here. Then, I soaked the finished web and stretched it to the edges of the frame, stapling it to the back of the frame while the web was still wet. For a finishing touch, I placed a rubber spider that I glittered last year on the web and called it a success.
What fun projects have you done for Halloween this season? If you link to your photos or blog, I promise to pop by for a peek.
Have a great weekend!
Saturday, October 26, 2013
Sunday, October 20, 2013
Tutorial: How to make Nightmare Before Christmas Pumpkins
Having long been a fan of the movie "The Nightmare Before Christmas", we have made pumpkins in tribute to many characters over the Halloween years. (See here and a few here ) But, each year, our pretty pumpkins decay and are composted. So this year we decided to add a few details to our annual front yard cemetery using pumpkins that will last a lot longer!
Supplies Needed:
A Funkin, or any other carveable fake pumpkin from your local hobby shoppe
X-acto knife
Template for carving (easy Google image search)
Black acrylic paint and small paintbrush
A push pin
Directions:
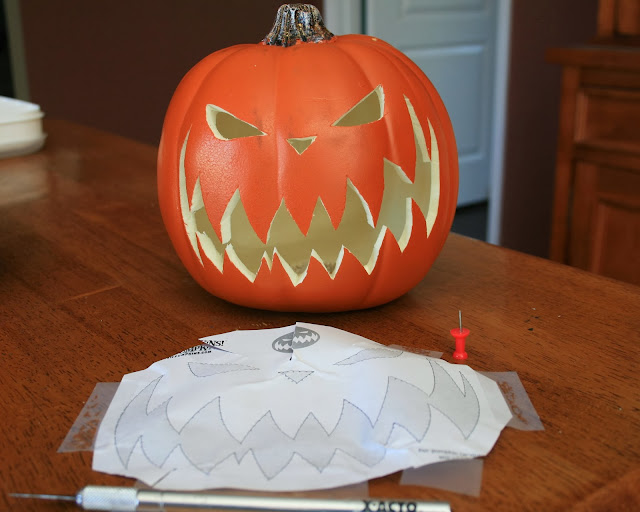
1- Tape your template of choice to the Funkin and dot the outline using the push pin.
2- Using your X-acto knife, carve around the outline. As this was my first experience with fake pumpkins, I will tell you, they are inconsistently thick and thin, so watch where your fingers are so that you do not cut yourself. Remove all carved pieces.
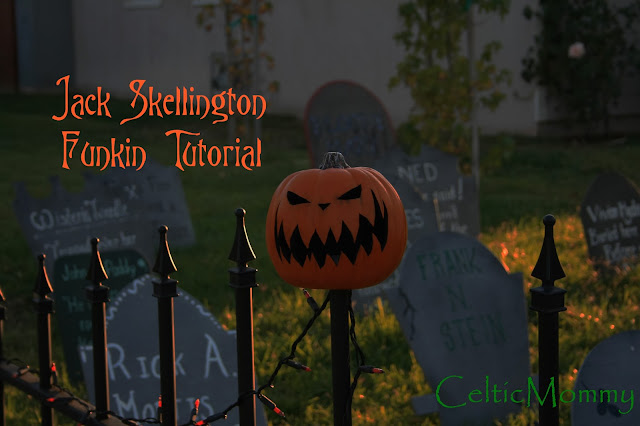
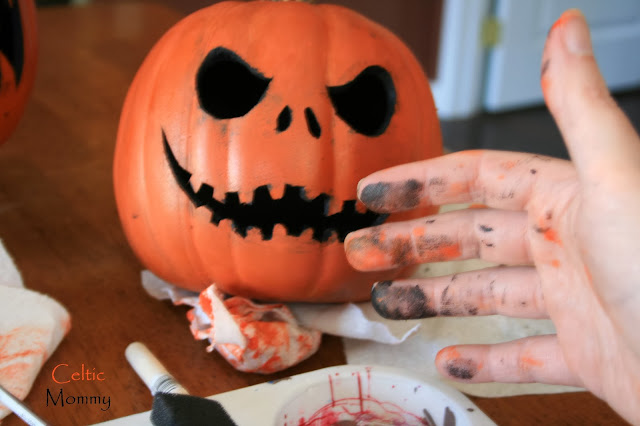
3- Make a 1 inch diameter hole in the bottom of the pumpkin. If you plan to light your pumpkin with a battery operated light, this hole will need to be bigger. I am not lighting them, but placing on our fake fences, so I only made the hole wide enough for the paint in Step 4 and to fit on my fence as you see in the top photo.
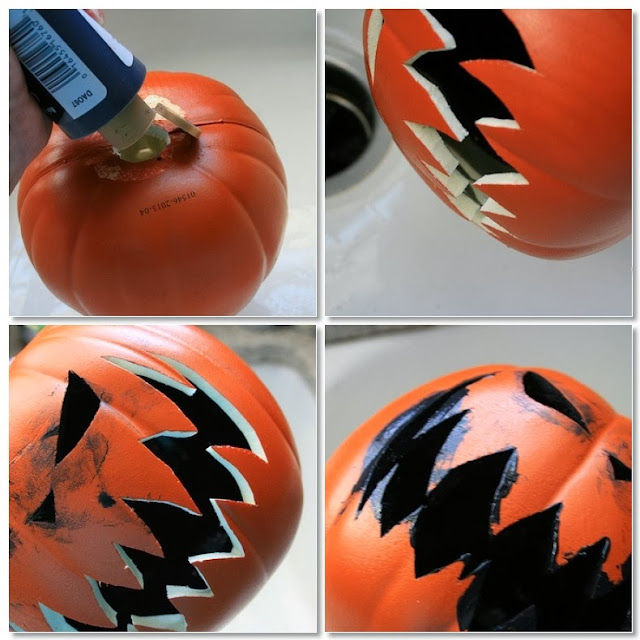
4- The messy step! I recommend doing this over your sink with paper towels nearby. Using the acrylic paint, squeeze generous amount into bottom of pumpkin, first coating the uncut back by rolling the pumpkin around slowly. I tried watering down the paint but it just rolled around in the pumpkin and made a big mess. Keeping the paint thick helped it to coat the Funkin nicely. Use the brush to accent the creamy part of the cut pumpkin as you see in the below photo. Try not to get too much black paint on the outside, but it will wipe away with a damp sponge if needed.
5- The bonus of making a mess on the outside of the pumpkin is that you can accent it as you see fit.
6- Once the inside is thoroughly coated, set upright on a container (like a clean yogurt cup) to drain and dry for a day or so.
When you're done, you will have a Jack Skellington (or other image you chose) pumpkin to last through years of trick or treating.
Happy Halloween!
Saturday, October 19, 2013
Tutorial Tomorrow
Our October weekends have been full of family and Halloween preparation. I've greatly missed this space, but have plans for a few goodies coming up! I finally bought my first fake pumpkins at a 50% off sale a few weeks ago and will be posting a tutorial tomorrow on how to make them look similar to the ones in the classic The Nightmare Before Christmas movie. If I have time, I also have an autumnal afternoon snack in the works.
Also coming up: In November, I have a free TARDIS hat pattern to crochet in honor of Doctor Who's 50th Anniversary. If you are a Whovian and a crocheter, this is the perfect hat to make and wear for the November 23rd episode!
I hope you are having a great weekend!
Saturday, October 5, 2013
Unfinished Business
Quite some time ago, longer than I care to admit, my husband's Auntie L asked for my advice. She plopped an old bag down in front of me with granny squares of every color made in the mid-1970s! These belonged to her mother, the only crocheter in the family I believe. Could I help her find the pattern? What could she do with them? Could I complete whatever it was?
Promising very little, I took the squares home. In the bag was the second page of a pattern that was clearly NOT where the granny squares came from. They had the smell of forgotten closet storage, they made me sad. I put her bag in my craft room and it sat. And sat. Many months later, Auntie L gently asked me about the squares and I took them out to think. I moved them around on my floor, wondering what I could do. Then I stopped wondering about my dilemma and wondered about the woman who originally made them. This woman was my husband's grandma and the only one I had never met in a vast family of loving and interesting people.
I wondered what type of projects these scraps of yarn came from-- baby blanket and afghan remnants perhaps? Where were her hooks? What did she think? My mind wandered back to my own grandmother, my crochet teacher, and it made me think about her works in progress. What happened to them when she passed? I have blankets that she made, but nothing that was unfinished. How wonderful it would have been for me to finished something of hers!
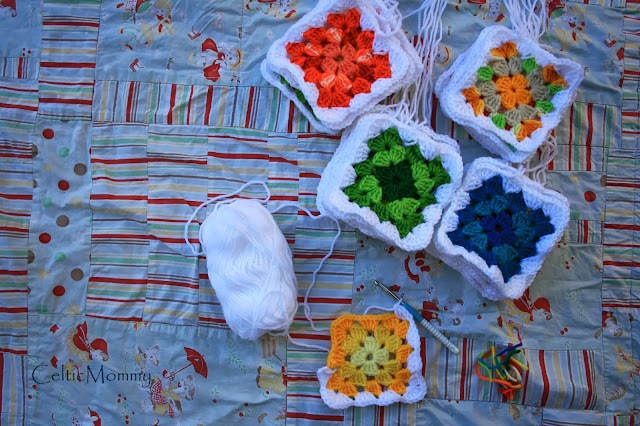
Since, I do not have unfinished projects from my own family, I looked on this project for my husband's Auntie with renewed energy. I washed the granny squares and plotted an accent color to tie them all together. For the next several months, everywhere I went, the grannies went. I decided to stay true to her pattern, only adding another round to make them large enough for a lapghan. Though I never met the grandma who made these grannies, I feel close to her-- touching her perfect rows of double crochet.
Around and around I crochet, weaving in her ends and adding my own to be weaved in. The yellow granny you see in the photo is the last of the twenty eight 4" squares. I will re-block them next, seam them together and do a few finishing rounds before handing them back to Auntie L as a memento of her mother. Thinking about that day, makes me smile. It's coming soon.
Subscribe to:
Posts (Atom)


